Introduction
Over the past few weeks, I have been experimenting with and learning more about
the popular PyTorch (torch) package that like Keras and Tensorflow,
provides an easy way to implement deep learning algorithms. In this post, I
show why I think torch’s Dataset class is an elegant and beginner-friendly
way to handle the process of data processing. As I have written
previously, it’s more important to ensure you have the correct
data than actually implementing a target model. This, of course, is not to say
that implementing a model is always straightforward. However, it is easier
and faster to fix an erroneous model than it is to correct the data processing
pipeline.
With the importance of data processing re-emphasised, let us dive into the beauty
of the torch Dataset class.
But First, a word on Li Thresholding
As part of my experiments over the past few weeks, I came across Li Thresholding, which was until this year an unknown method to me. Since I liked this method, I thought it would be great to write a word or two about it.
In this blog post, we shall be using a simple two image dataset organised as follows:
* sample
  * train
    - images
    - masks
Li Thresholding with scikit-image
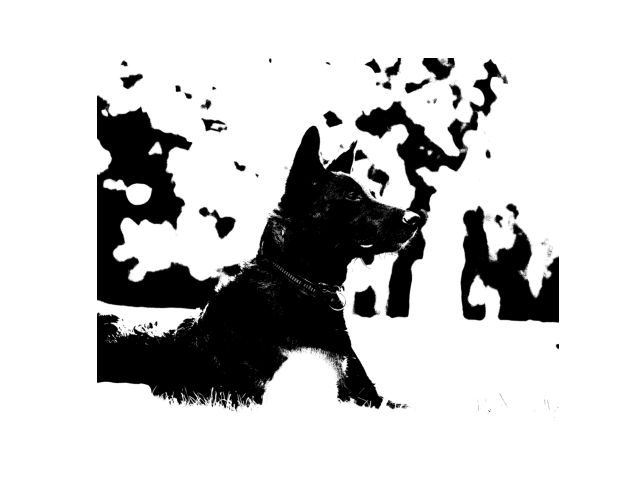
Li thresholding is a thresholding method introduced by Li & Lee, 1993 that finds an optimum threshold by minimising the cross entropy between an image and its segmentation.
In the scikit-image implementation, you can either use the method with defaults or supply an initial guess to use to find the optimal threshold. In this example, we will calculate the 95% quantile based on the grayscale image and use this as the initial_guess argument of the threshold_li method.
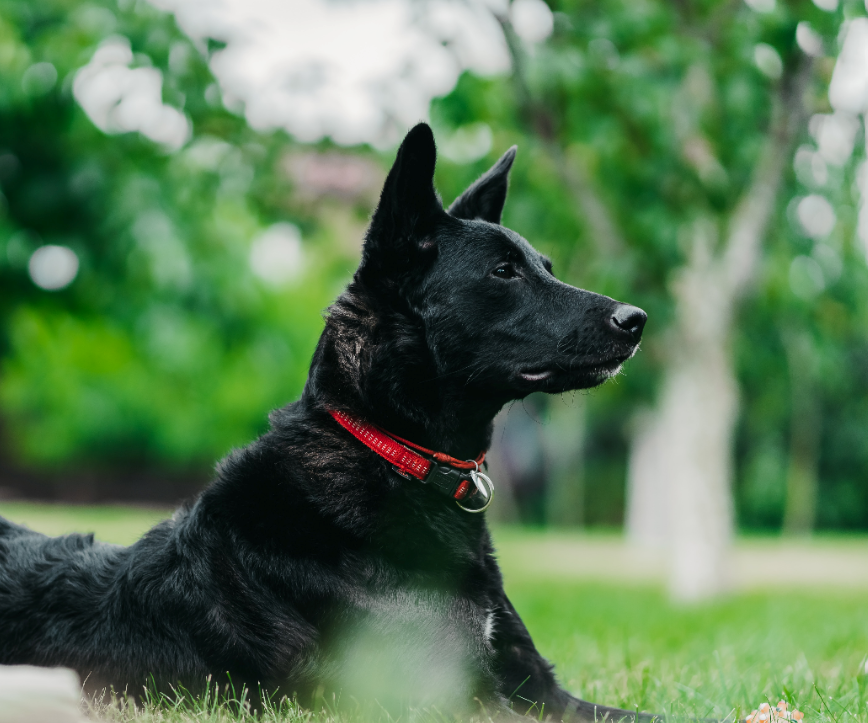
In summary, we read a colored image,convert it to grayscale, and finally threshold with the Li method. For convenience, I did not perform Gaussian denoising. I have also recently read that Gaussian pre-processing may increase the likelihood of overfitting in convolutional neural networks.
The full process in code:
import cv2
from skimage.filters import threshold_li
from skimage.io import imread
import numpy as np

img = imread("https://github.com/Nelson-Gon/nelson-gon.github.io/blob/master/images/dog-test.png?raw=true")
gray_img = cv2.cvtColor(img, cv2.COLOR_RGB2GRAY)
li_thresh = threshold_li(gray_img, initial_guess=np.quantile(gray_img,0.95))
thresholded_image = gray_img > li_thresh
thresholded_numpy = np.array(thresholded_image).astype("uint8")
plt.imshow(thresholded_numpy, cmap="gray")
plt.axis("off")
The result:
I will leave it at that for Li thresholding and leave further exploration to
those who may be interested in the same. We now proceed with the main aim of this
blogpost: appreciating the elegance of Dataset.
Writing a simple custom data loader with torch
If you are coming from a Keras/Tensorflow background (like myself), you will
probably (dis)agree that the data processing process in Keras/Tensorflow is
less obvious and may sometimes feel less programmer-like. To be clear, this is
not meant to say that the Keras/Tensorflow combination is bad. On the contrary,
I love the model building process but think torch provides an easier data
processing implementation to work with.
To write a simple custom data loader, we will need to import the following modules/packages:
from torch.utils.data import Dataset
import glob
import os
import torch
from skimage.io import imread
import torchvision.transforms as tf
from PIL import Image
import matplotlib.pyplot as plt
For purposes of this blog post, I wanted the CustomDataLoader to do only two
things:
- Read image, mask pairs in the provided directories.
- Perform simple transformations on the images/masks. In this case, we will simply
resize the images and convert them to
PILimages.
Creating our class
To create the class, one simply inherits from the Dataset class which I
think is a great way to work with, and also because I like the idea of
inheritance. For this simple example, the class __init__ function will only
take an image directory argument, a mask directory argument, an image suffix,
and target_size specifying the target size for our resizing. We also add some
sanity checks to ensure that we get exactly what we expect. The class then
becomes:
class CustomDataLoader(Dataset):
    def __init__(self, train_images, train_labels, image_suffix="jpg", target_size=(30, 30)):
        """

        :param train_images: Directory containing train_images
        :param train_labels: Directory containing train_labels
        :param image_suffix: Image suffix, for convenience
        :param target_size

        """

        self.train_images = train_images
        self.train_labels = train_labels
        self.image_suffix = image_suffix
        self.target_size = target_size

        # Include sanity checks

        # In this case, we only check that both train_images and train_labels directories exist
        # We also ensure that we get the correct image suffix, jpg and png here

        if not (all(os.path.isdir(directory) for directory in [train_images, train_labels])):
            raise NotADirectoryError("Please ensure that both train_images and train_labels are valid directories.")

        if not self.image_suffix in ["png", "jpg","jpeg"]:
            raise ValueError("Only supporting PNG and JPG files for now.")

        # glob for our file names
        # sorted because I prefer 1, 10, 11, ...
        # ideally should be able to glob both png and jpg, for simplicity glob only one type
        self.image_list = sorted(glob.glob(self.train_images + "/*" + self.image_suffix))
        self.labels_list = sorted(glob.glob(self.train_labels + "/*" + self.image_suffix))


        if len(self.image_list) != len(self.labels_list):
            raise ValueError("Images list and labels list should be the same length.")
Next, by convention, and also for sanity checking, we define a __len__ method
that will return the length of all images in the directory ie how many images
we will work with.
    def __len__(self):
        """

        :return: length of the dataset

        """
        return len(self.image_list)
As stated above, we also define a transform method that will allow us to
transform images. Here we will simply transform them by changing their size to
the target size defined in __init__ and also converting to Image since this
is what torch is happy to work with.
 def transform(self, image):
        # Basic, convert to PIL since torch tensors only work with PIL
        # Basic resizing
        to_pil = Image.fromarray(image)
        # resize_image
        resizer = tf.Resize(self.target_size)
        image = resizer(to_pil)
        return image
Oh the elegance of get_item!
Finally, here comes what I think is the most elegant part of the Dataset class.
We can define a “getter” method __get__item that will allow us to work with
one image at a time. I think it could be thought of as a generator that calls
next(iter) since what we are really doing is “looping” through the data one index at a time and doing the necessary transformations.
Programmatically:
    def __getitem__(self, img_index):
        if torch.is_tensor(img_index):
            img_index = img_index.tolist()

        train_image = imread(self.image_list[img_index])
        train_label = imread(self.labels_list[img_index])

        return {"image":self.transform(train_image), "mask":self.transform(train_label)}
Putting it all together
class CustomDataLoader(Dataset):
    def __init__(self, train_images, train_labels, image_suffix="jpg", target_size=(30, 30)):
        """

        :param train_images: Directory containing train_images
        :param train_labels: Directory containing train_labels
        :param image_suffix: Image suffix, for convenience
        :param target_size

        """

        self.train_images = train_images
        self.train_labels = train_labels
        self.image_suffix = image_suffix
        self.target_size = target_size

        # Include sanity checks

        # In this case, we only check that both train_images and train_labels directories exist
        # We also ensure that we get the correct image suffix, jpg and png here

        if not (all(os.path.isdir(directory) for directory in [train_images, train_labels])):
            raise NotADirectoryError("Please ensure that both train_images and train_labels are valid directories.")

        if not self.image_suffix in ["png", "jpg","jpeg"]:
            raise ValueError("Only supporting PNG and JPG files for now.")

        # glob for our file names
        # sorted because I prefer 1, 10, 11, ...
        # ideally should be able to glob both png and jpg, for simplicity glob only one type
        self.image_list = sorted(glob.glob(self.train_images + "/*" + self.image_suffix))
        self.labels_list = sorted(glob.glob(self.train_labels + "/*" + self.image_suffix))


        if len(self.image_list) != len(self.labels_list):
            raise ValueError("Images list and labels list should be the same length.")

    def __len__(self):
        """

        :return: length of the dataset

        """
        return len(self.image_list)

    def transform(self, image):
        # Basic, convert to PIL since torch tensors only work with PIL
        # Basic resizing
        to_pil = Image.fromarray(image)
        # resize_image
        resizer = tf.Resize(self.target_size)
        image = resizer(to_pil)
        return image

    def __getitem__(self, img_index):
        if torch.is_tensor(img_index):
            img_index = img_index.tolist()

        train_image = imread(self.image_list[img_index])
        train_label = imread(self.labels_list[img_index])

        return {"image":self.transform(train_image),
                                "mask":self.transform(train_label)}
Usage
To use our newly created dataset, we can simply create an object as usual:
images_loader = CustomDataLoader("path_to_images","path_to_masks",
                                 target_size= (512, 512), image_suffix="png")
Finally, to test and for purposes of this post, we will simply use next(iter)
or simply “manual” indexing:
next(iter(images_loader))
I will demonstrate what happens when we try to plot the image at index 0
by using manual indexing:
plt.imshow(images_loader[0]["image"])
This gives us:
Next Steps
In this blog post, we have really looked at a very basic example of the elegance of the torch Dataset class. As a next step, one could implement the following in our CustomDataLoader class:
-
Perform more transformations in
transformfor example random flipping of images. -
Extend the data loader to handle multiple image types.
-
Finalize the transform by converting to a torch tensors. This is important because when running models with the
torch.nn.Moduleclass, you will likely encounter errors that request that you use tensors.
Conclusion
The torch Dataset class is powerful and can be used to do more than just what
I state here. If you, are interested in learning more about the torch
package, I highly recommend that you take a look at the official
documentation, and spend some time exploring libraries that implement deep
learning methods using torch. The full code for this implementation is
available at https://github.com/Nelson-Gon/nelson-gon.github.io/blob/master/code/elegant_torch.py
Thank you very much for reading. As always, do comment below or contact me if you would like to discuss any of the posts/projects on this site.
Keep Building
Modules used in this blog post
torch==1.7.1
torchvision==0.2.2.post3
opencv-python>=4.2 #actual 4.4.046
scikit-image>=0.16 #actual 0.18.1
References
https://www.sciencedirect.com/science/article/abs/pii/003132039390115D
https://en.wikipedia.org/wiki/Cross_entropy
https://github.com/Nelson-Gon/nelson-gon.github.io/blob/master/code/elegant_torch.py